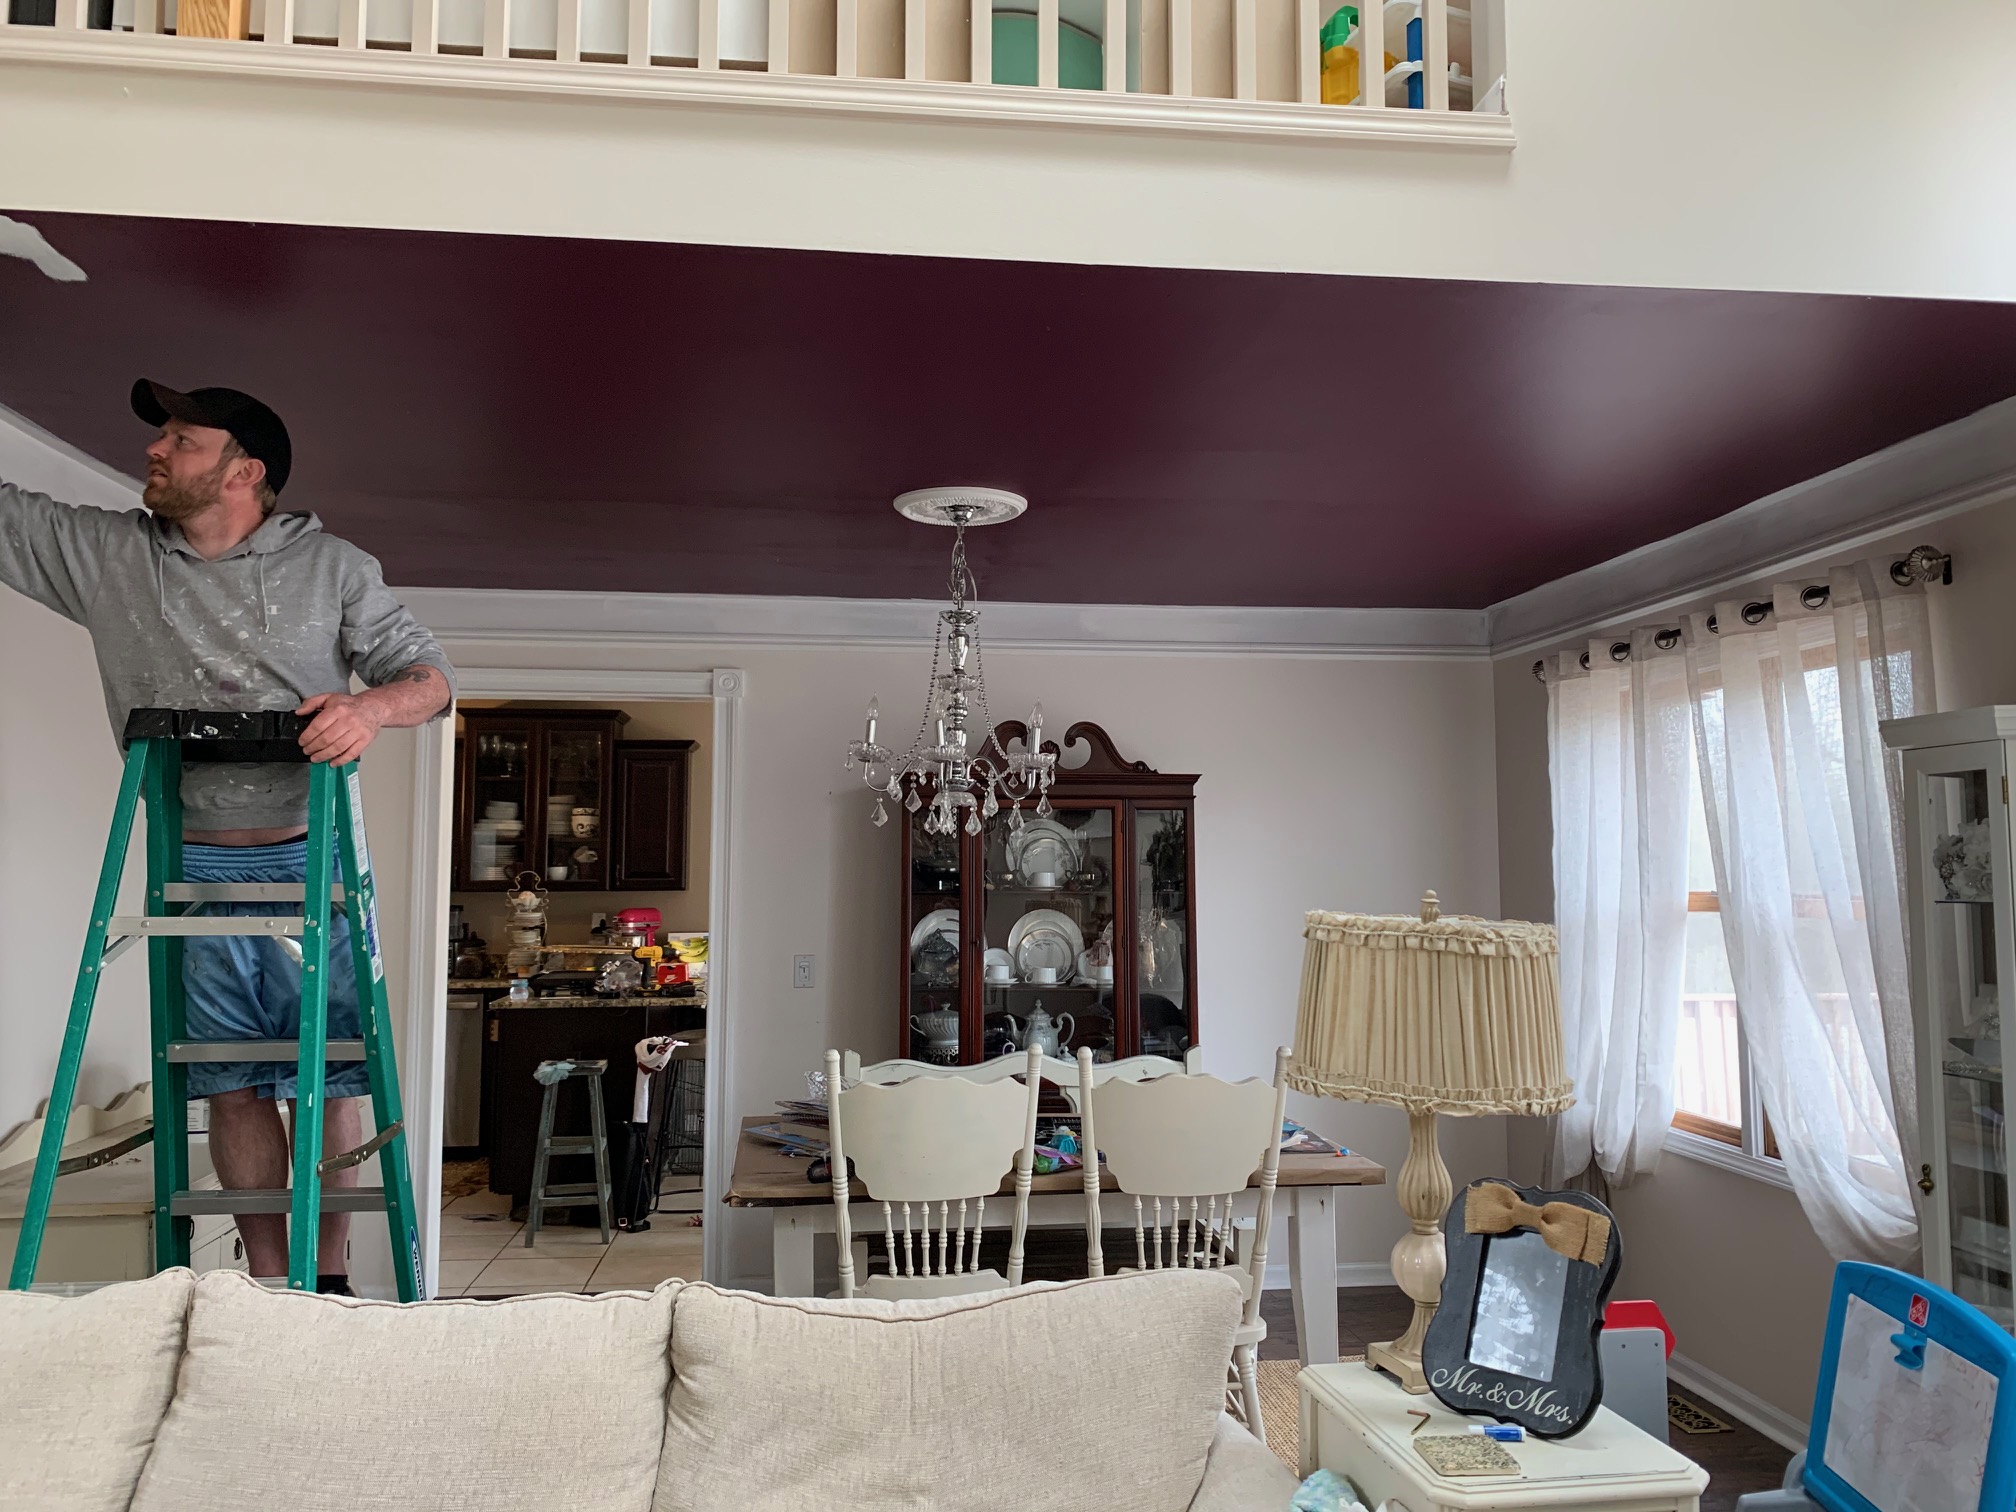
To say my style has changed throughout the years would be a major understatement. While the rest of my house was full of creamy whites and wooden accents, I had a dining room that sat in the middle of my floor plan with a deep plum CEILING. Now I did love this ceiling and in a different house it may have been completely doable, but 7 years later I was ready to make the dining room blend with the rest of my home.
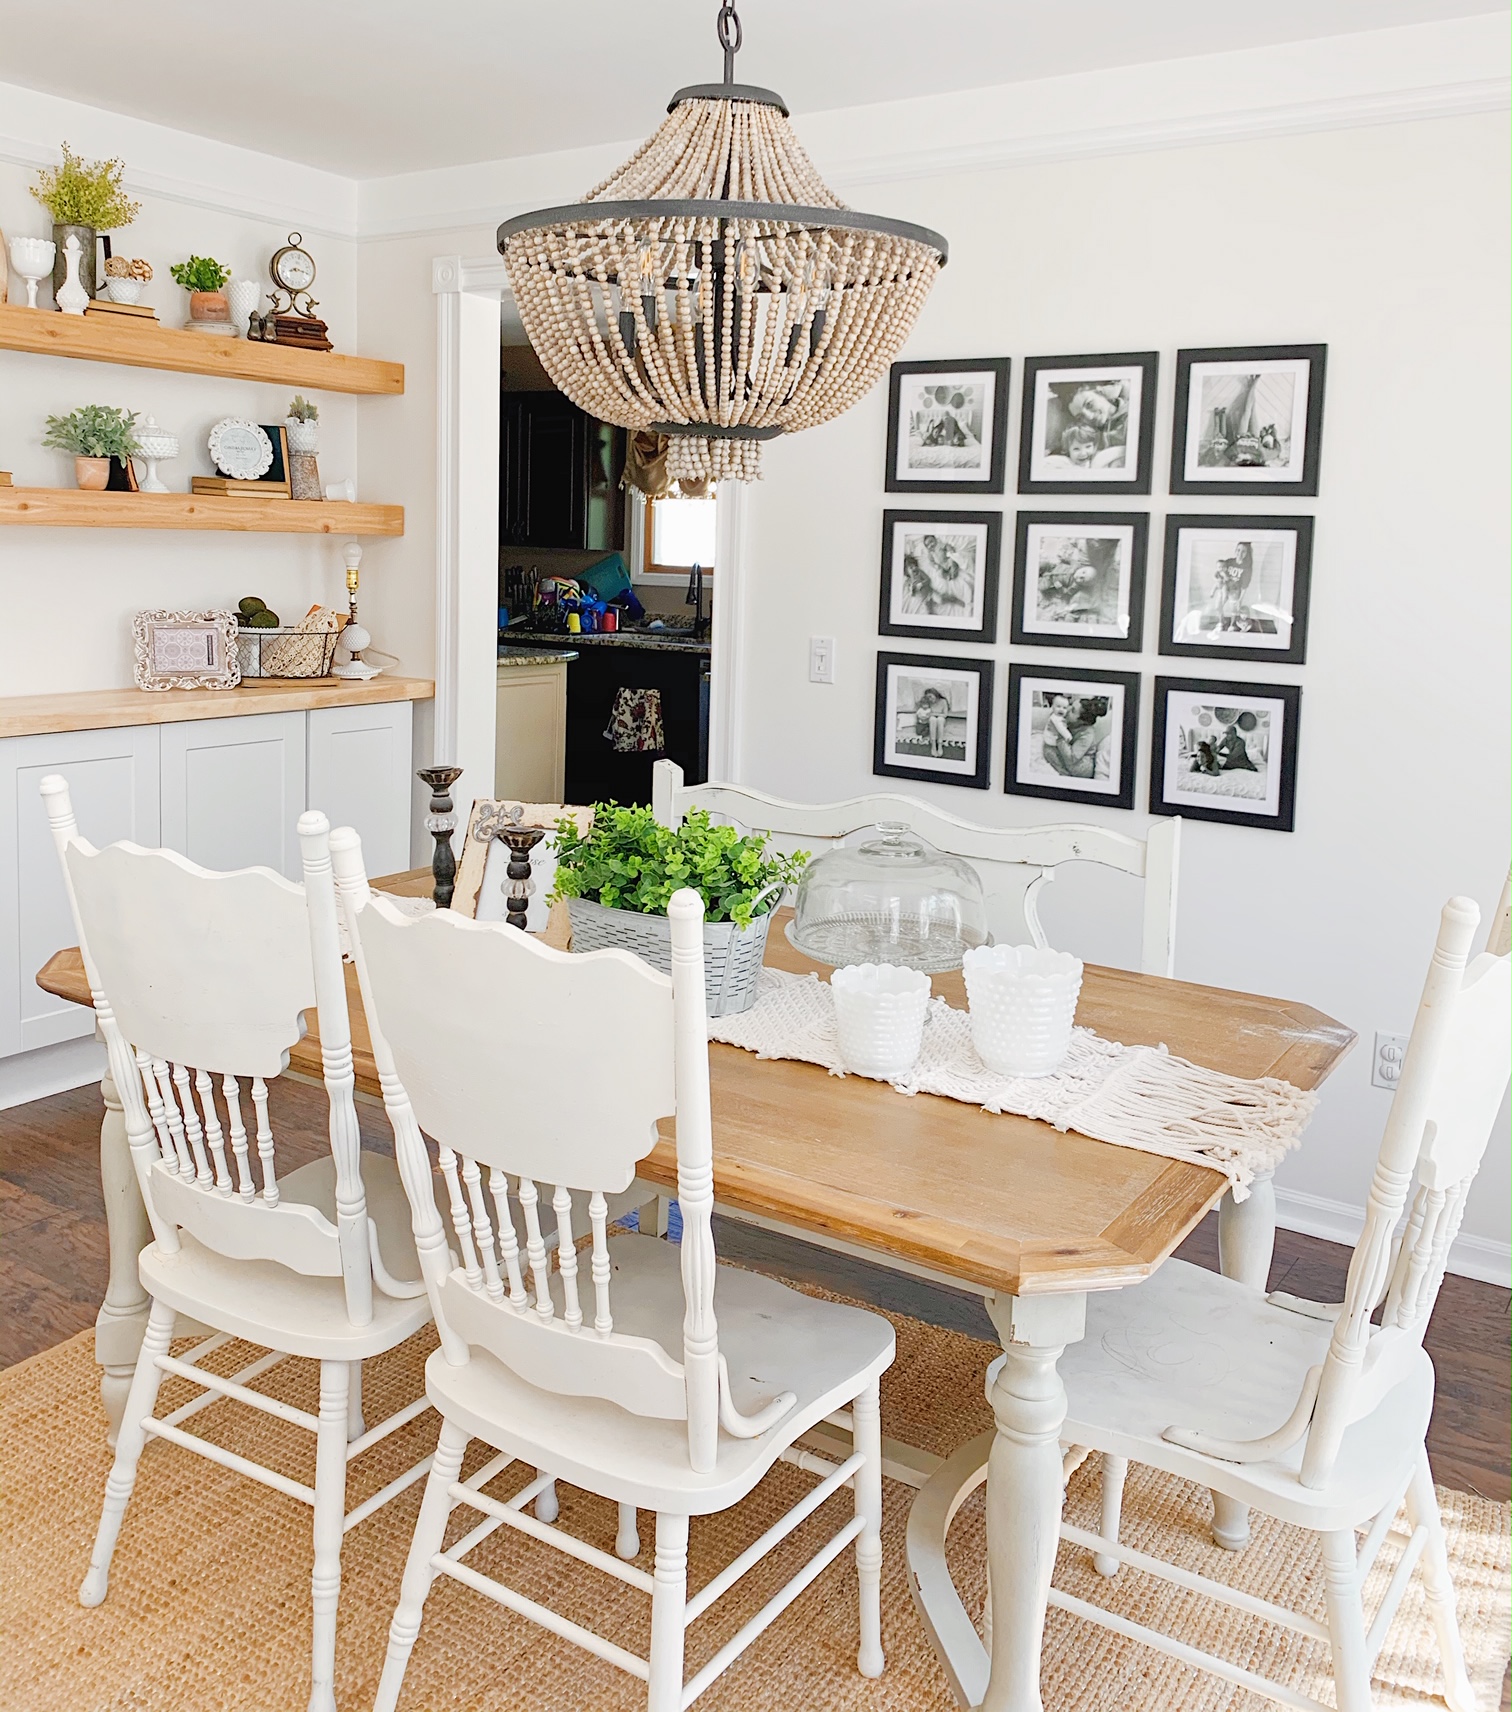
The first thing we did was sell all of the furniture we currently had. I had an old antique dark brown china cabinet that made the main focal point wall seem like it was closing in on the room. On the other wall I had a white buffet that I no longer felt fit.
Once we emptied the room, we repainted the ceiling a typical white and did the walls a slight off-white creamy brown based color. We had a chair molding separating the purple ceiling from the beige walls and we decided to leave it!
I knew I wanted a chandelier that was unique, the staple of the room. So many chandeliers were very typical and boring. I was planning to keep the room very simple so I needed something special. That is when I found this stunner from Kichler Lighting.

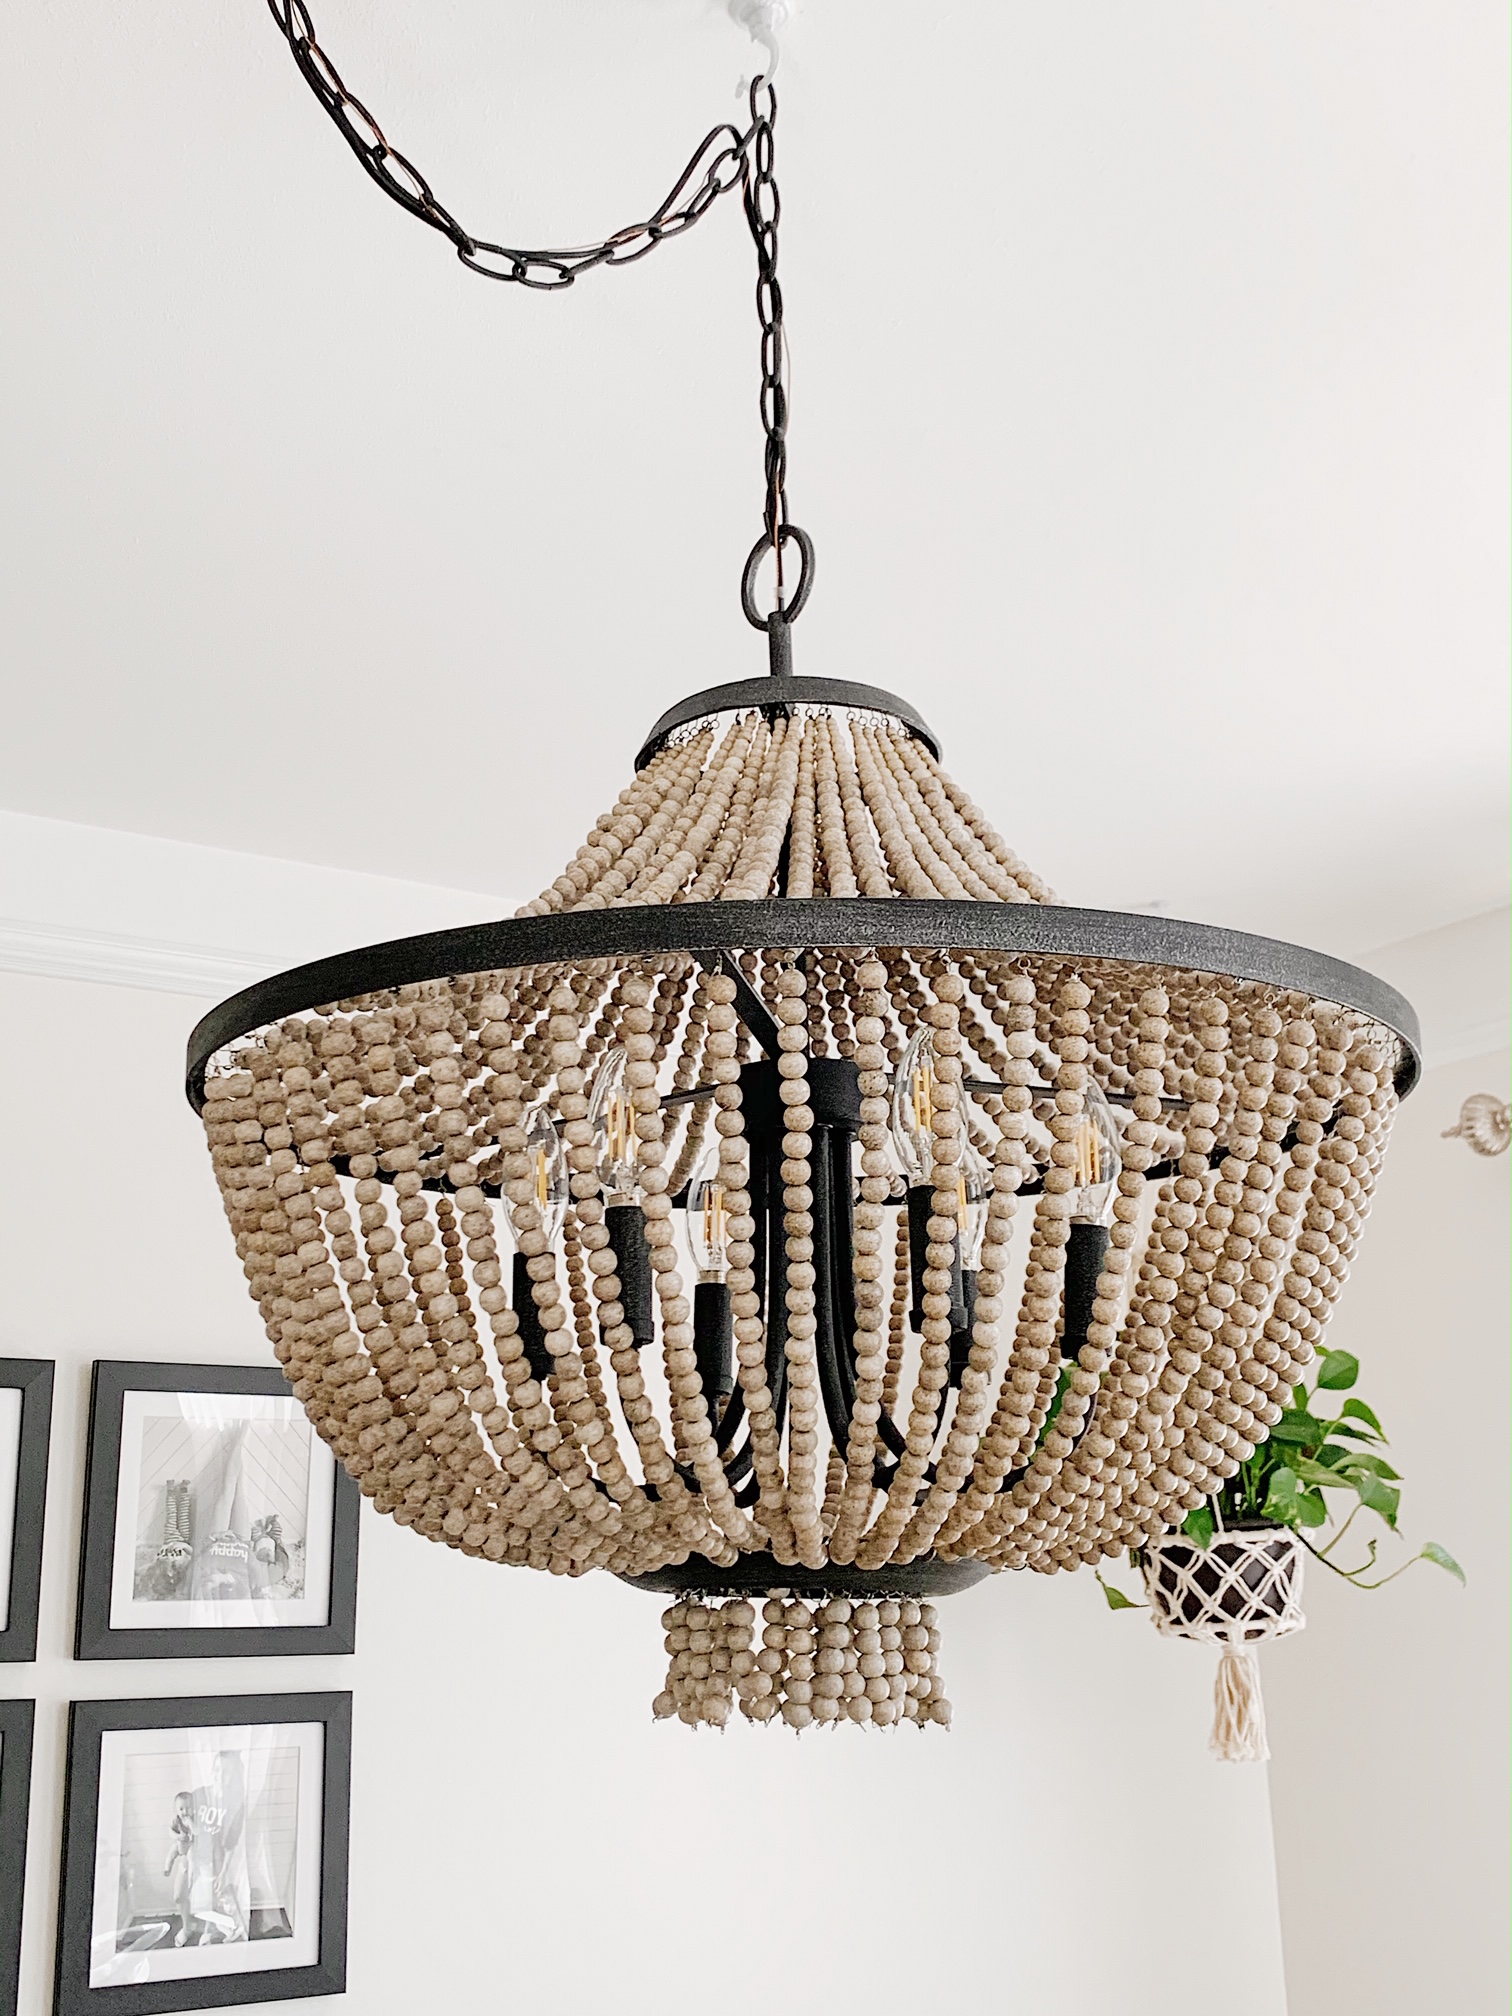
The chandelier is the perfect mix of casual elegance, with a farmhouse industrial feel. The beads are a light distressed beige that was perfect to tie in my wooden shelves and the steel, distressed black frame really stood out among the light walls. The chandelier is amazing quality and was exactly the look I was going for. Make sure to check out all they have to offer by clicking HERE!
I used the black of my chandelier to tie in my gallery wall.
I knew I wanted to do a wall of pictures but I anticipated wanting to do white. I quickly realized I needed something that would stand out and give that wall some character. I was VERY hesitant to go with black since I am all about neutrals but I absolutely love the way it came together. The black really tied together the chandelier and my few other black pieces like the hanging potted plant and curtain rod.
This gallery wall is from Frame it Easy.
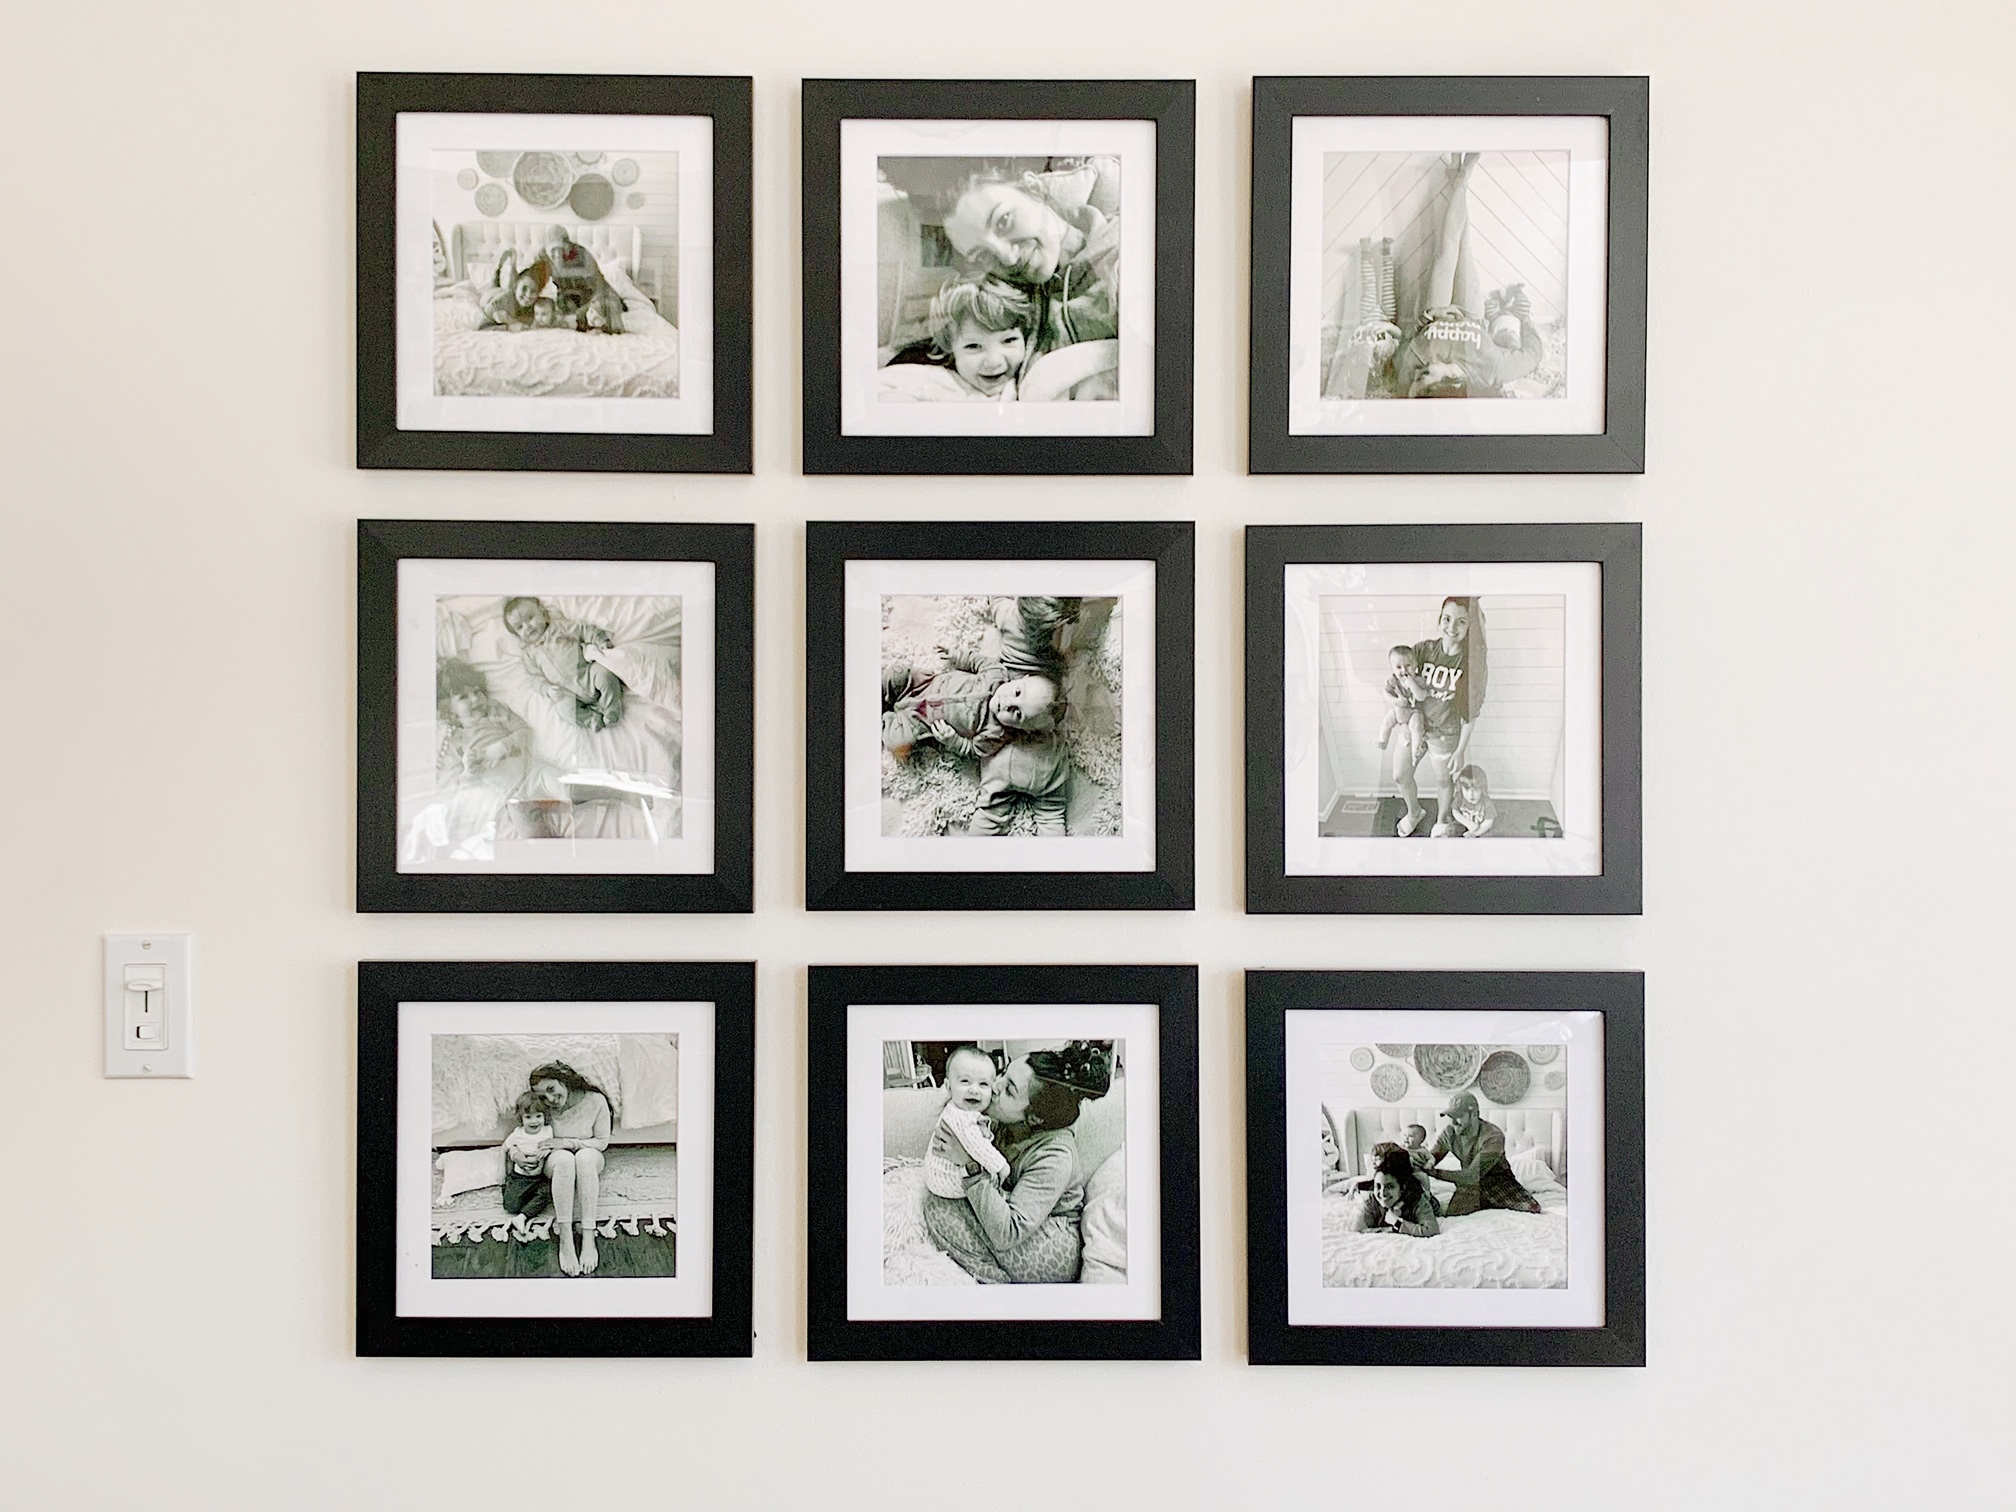
The site is a MUST for any gallery wall project. You can customize your every single part of your frames, from the wood, the color, and the size. It’s simple to use and the frames arrive with all the hardware you need, perfectly packaged. If you’re interested you can get 10% off your order using this link HERE
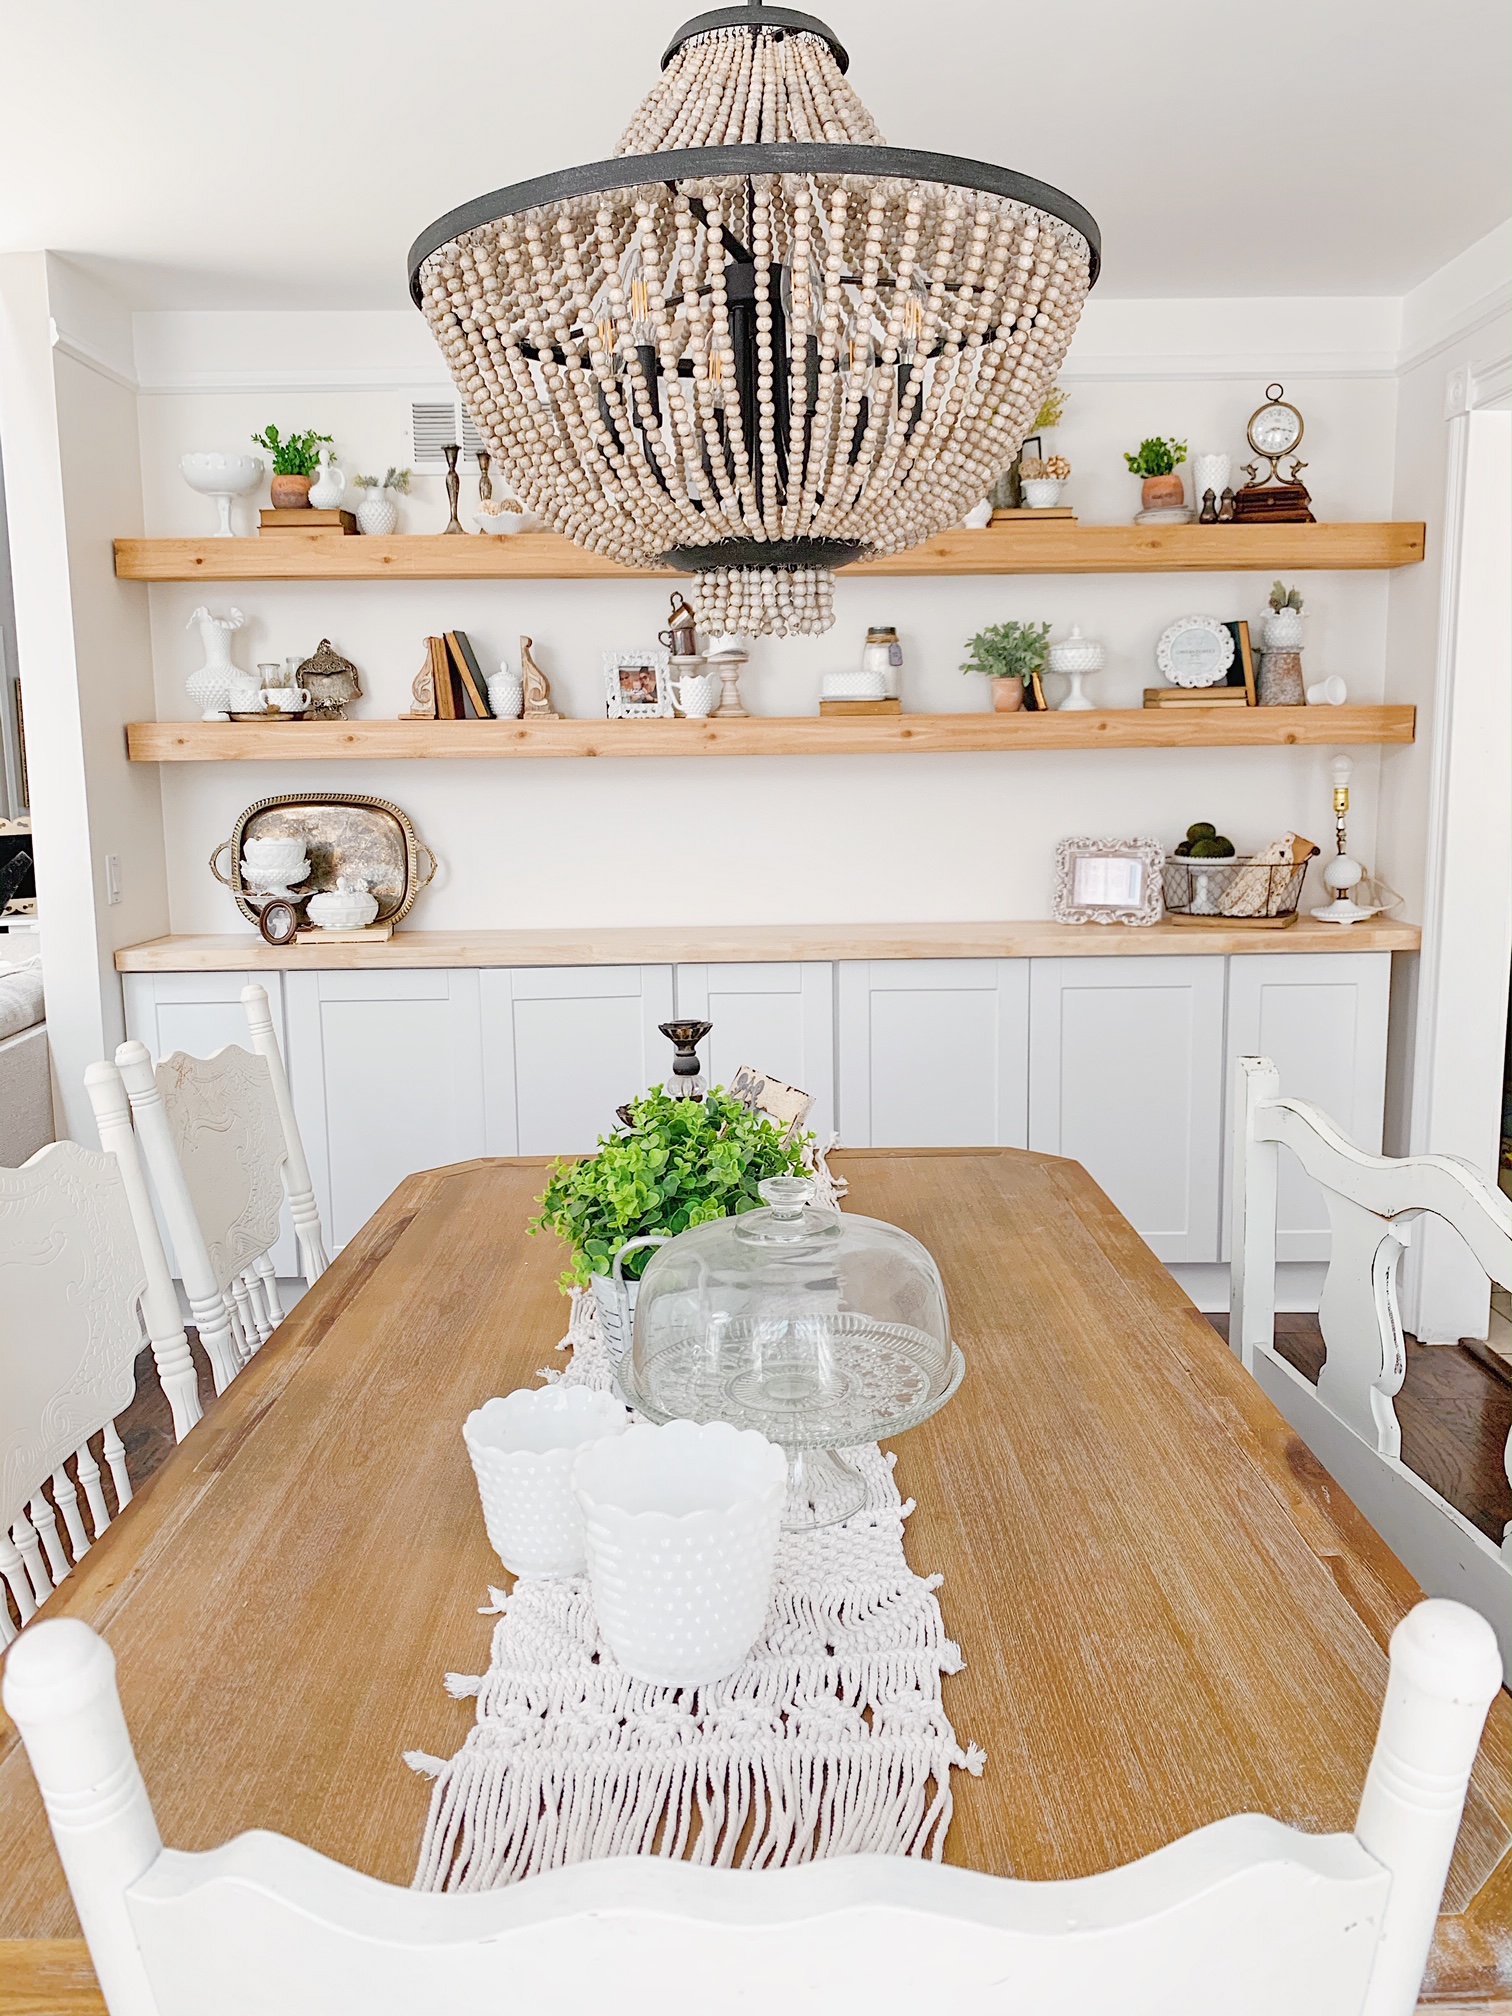
Now for as long as I remember I dreamed of doing a wall of built in cabinets on the one insetted wall in the room. I figured I would do it when I eventually redid my kitchen but as the quarantine started to get to me and my anxiety and sadness increased, my husband just said lets go for it! Which I am sure he instantly regretted, HA!
The wall is only about 15 inches from the opening to the family room and from the kitchen door way so we had to find 12 inch deep cabinets. We quickly realized these weren’t available in stock, so my handy man bought 12 inch upper cabinets and built a kick plate base to make them lowers!
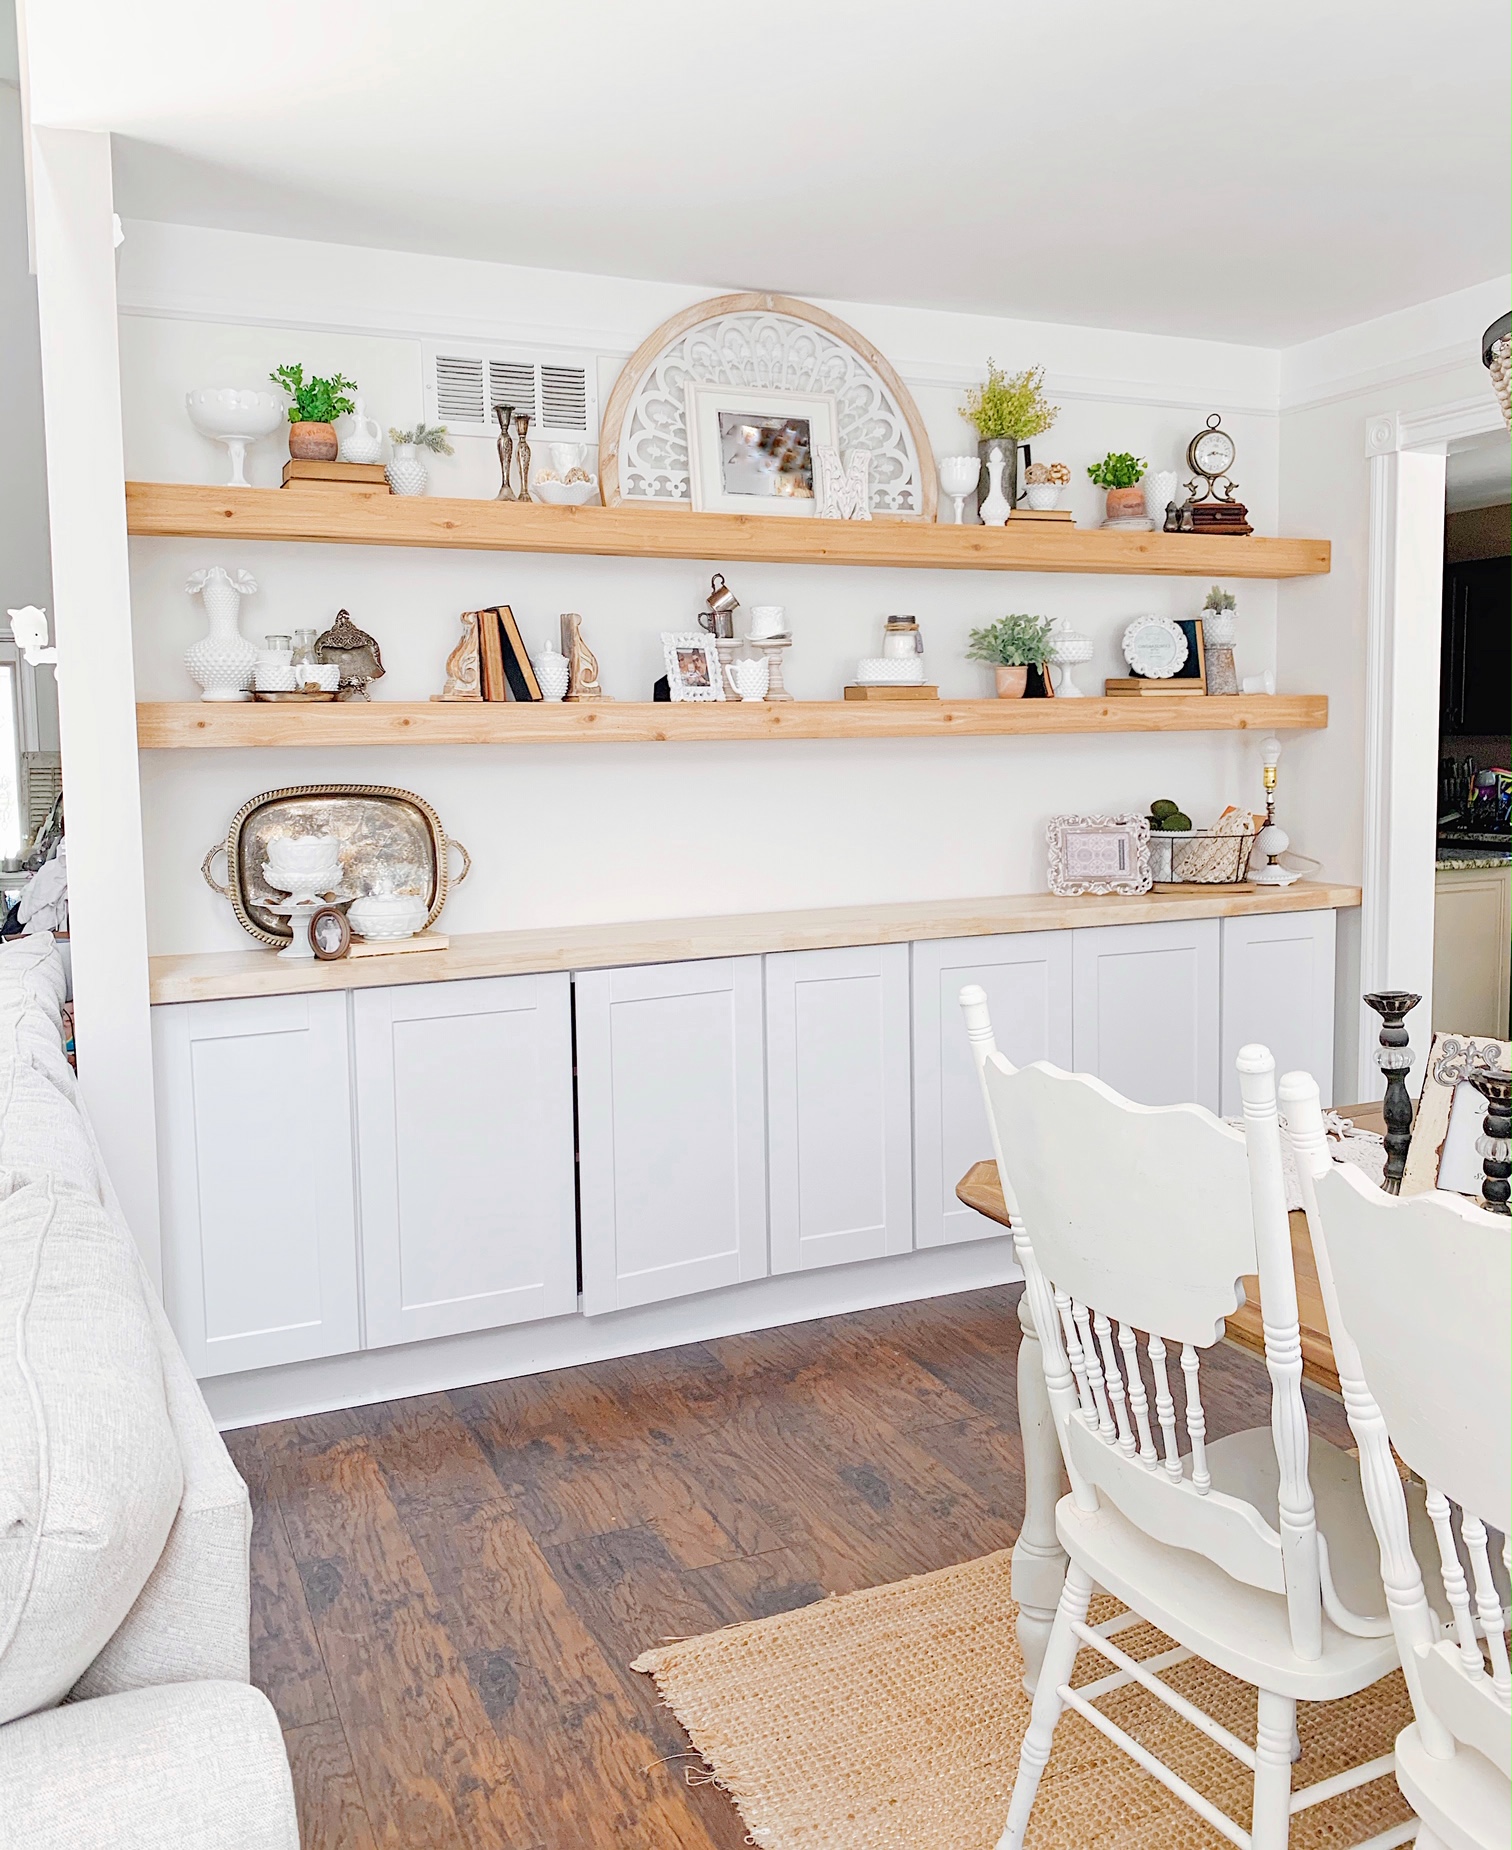
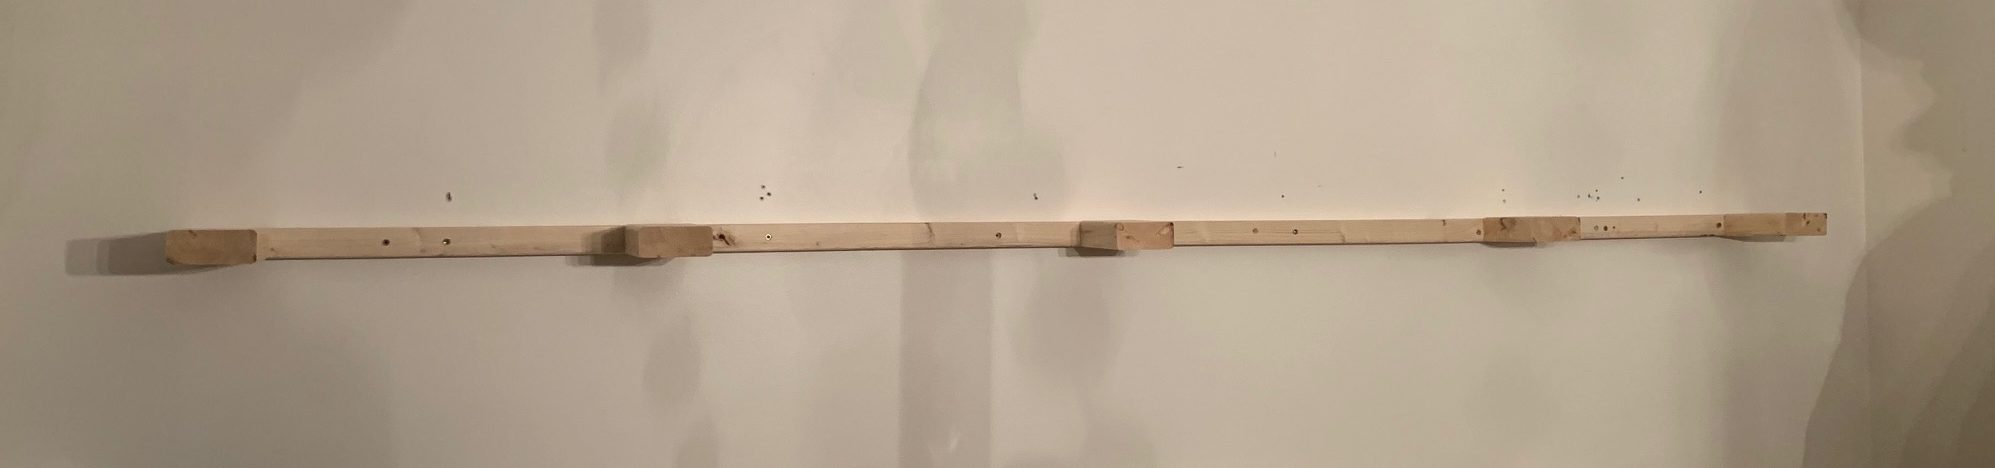
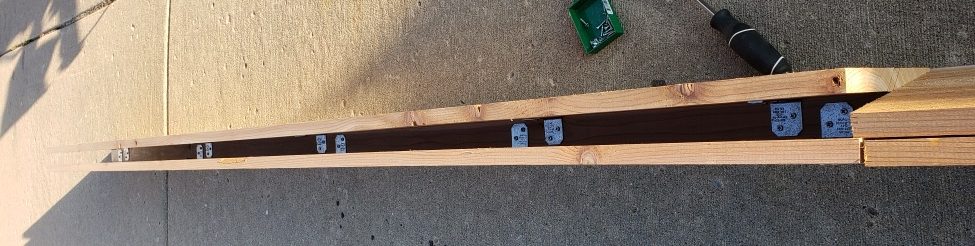
We purchased this butcher block countertop to complete the cabinet! I decided on floating shelves to give the room a more rustic feeling instead of formal dining room feel. Floating shelves online are INSANELY priced. We built these two cedar shelves for less than $300! My husband broke down the how to for you!:
-
First start by deciding the desired height and width of shelves (mine are 6 inches high and 10 inches deep) and purchase whatever type of wood you would prefer (we used cedar).
-
Build support bracket first. Based on thickness of shelf cavity use a 2×4 or 1×2 to be used for the wall anchor and attach pre cut 2×4 sections that will protrude from the wall and fill at least 80% of shelf width.
-
Make sure the precut 2×4 sections used for support are placed every 12 to 14 inches.
-
Attach support bracket to the wall ensuring it is secured into the wall studs.
-
once support bracket is attached to the wall make measurements for shelf length and cut all accordingly.
-
Use small L brackets that will attach the front of the shelf to the top and bottom ensuring that that the joint is not facing the front (gives full look of floating shelf).
-
Use small screw to attach the L brackets to the boards making sure they are long enough to hold yet small enough to not go all the way through.
-
Once shelf is built it will look like a U or C from the side and should slide easily over the support bracket already attached to the wall (the wall piece fits inside this piece).
-
Place a few screws across the top of the new shelf to ensure it stays in place.

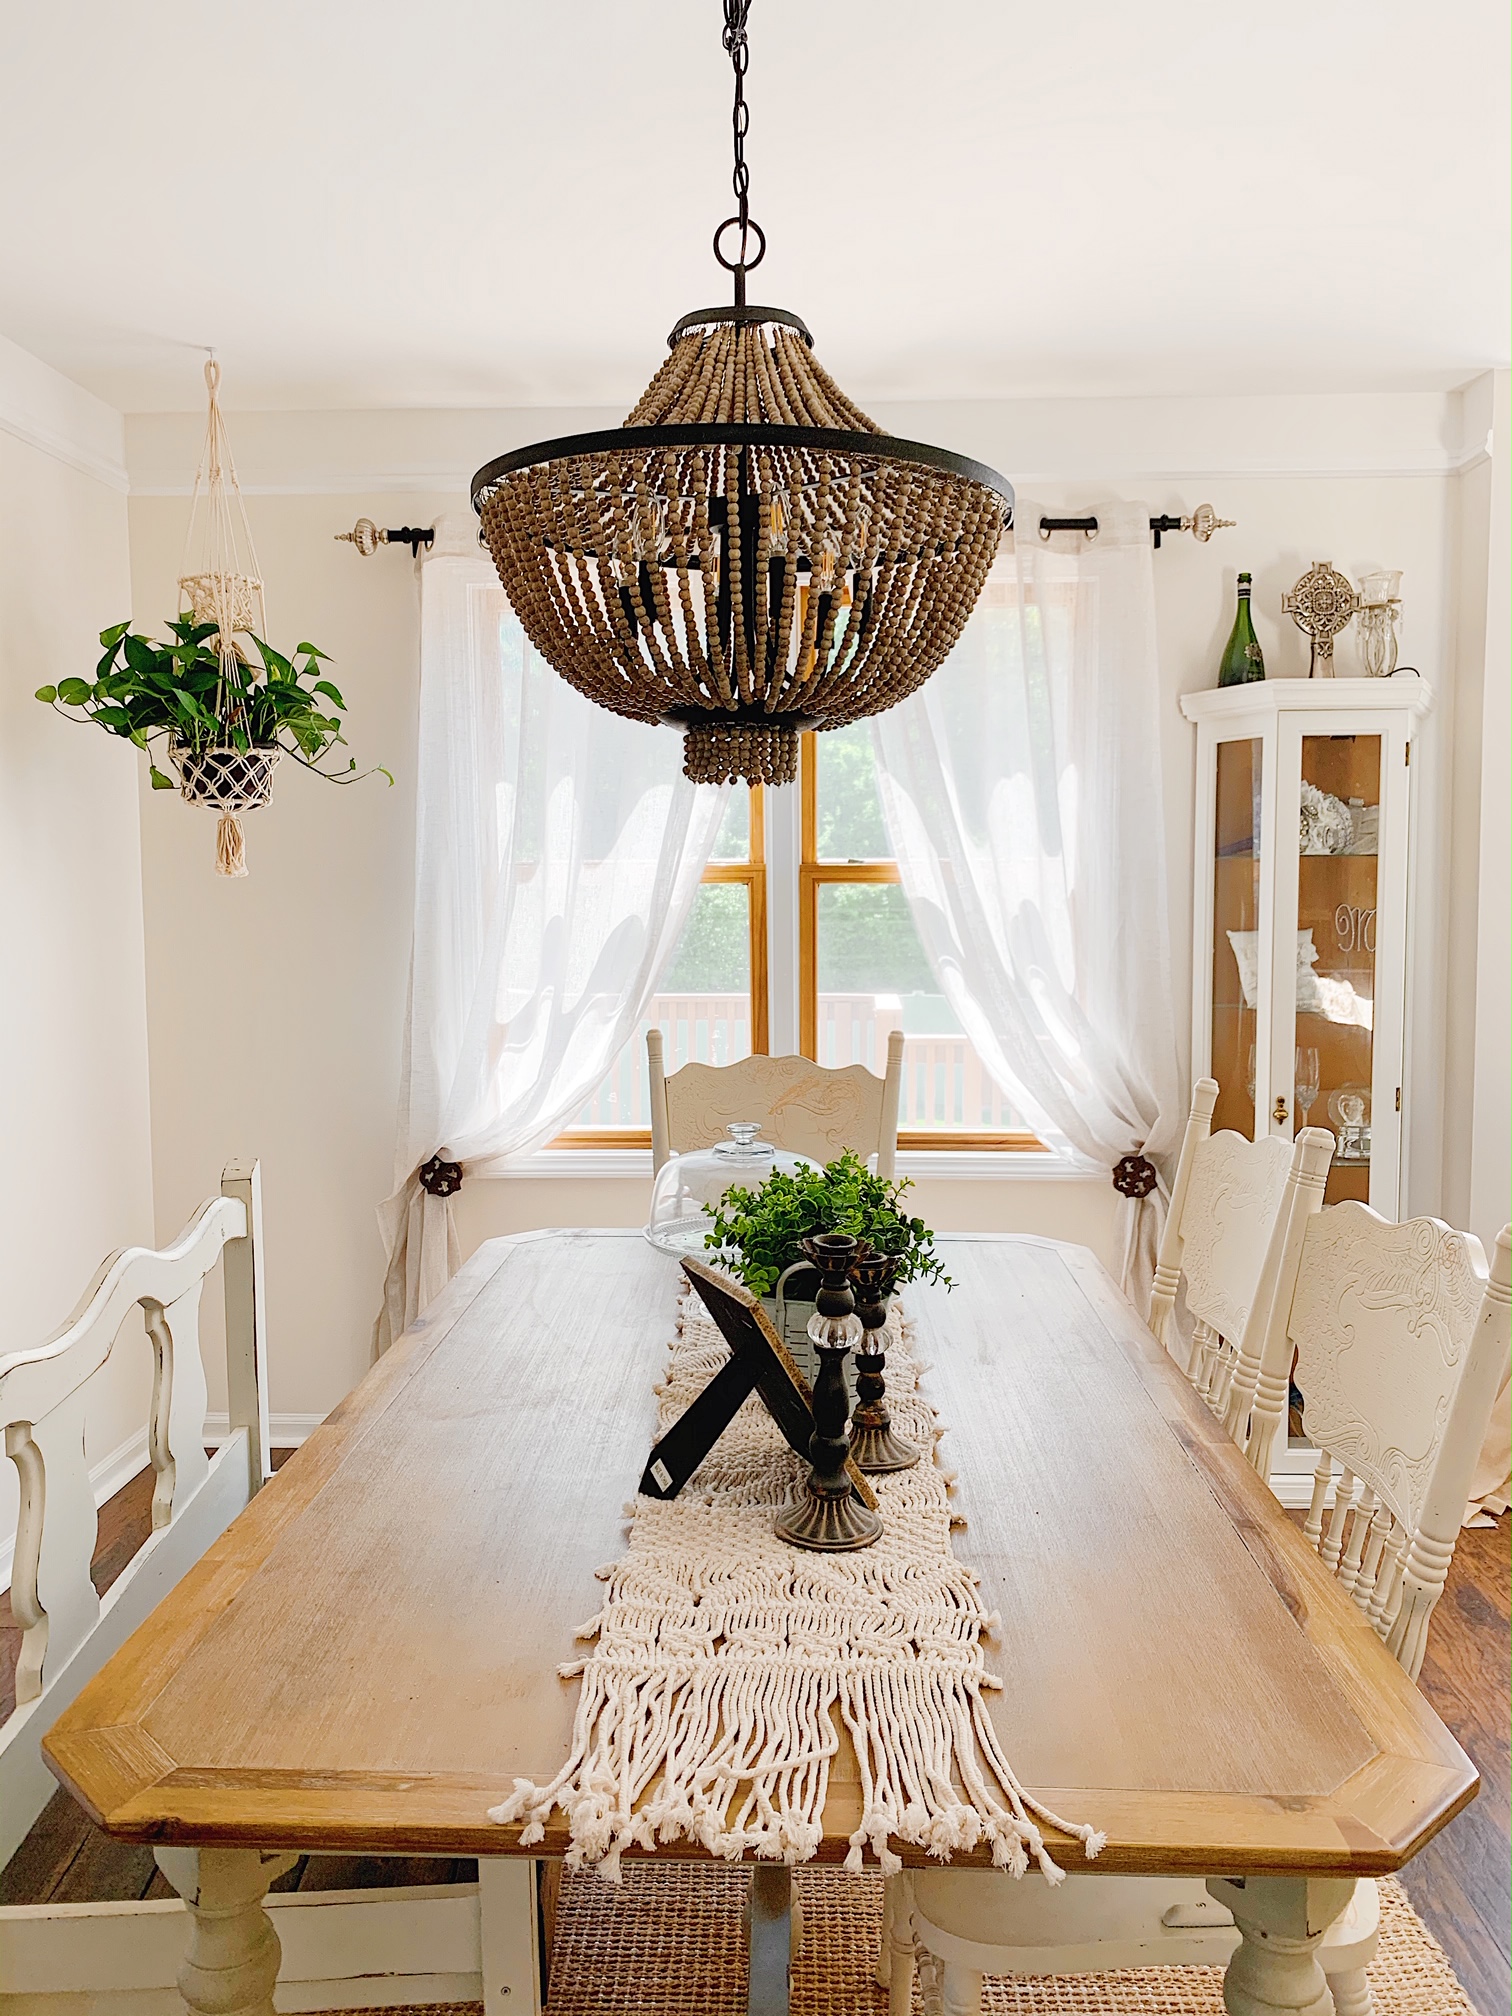
In love with my macrame table runner! You can grab it HERE !!

Another quarantine project complete 🙂 If you have any questions regarding the shelves or where I got any decor from feel free to message or comment! OH! and heres a little before pic 😉
Happy Decorating!
XO. Karlene